
Open Contact Support
Click Support in the left rail, then Contact Support. You can also open/support/contact directly in the app.
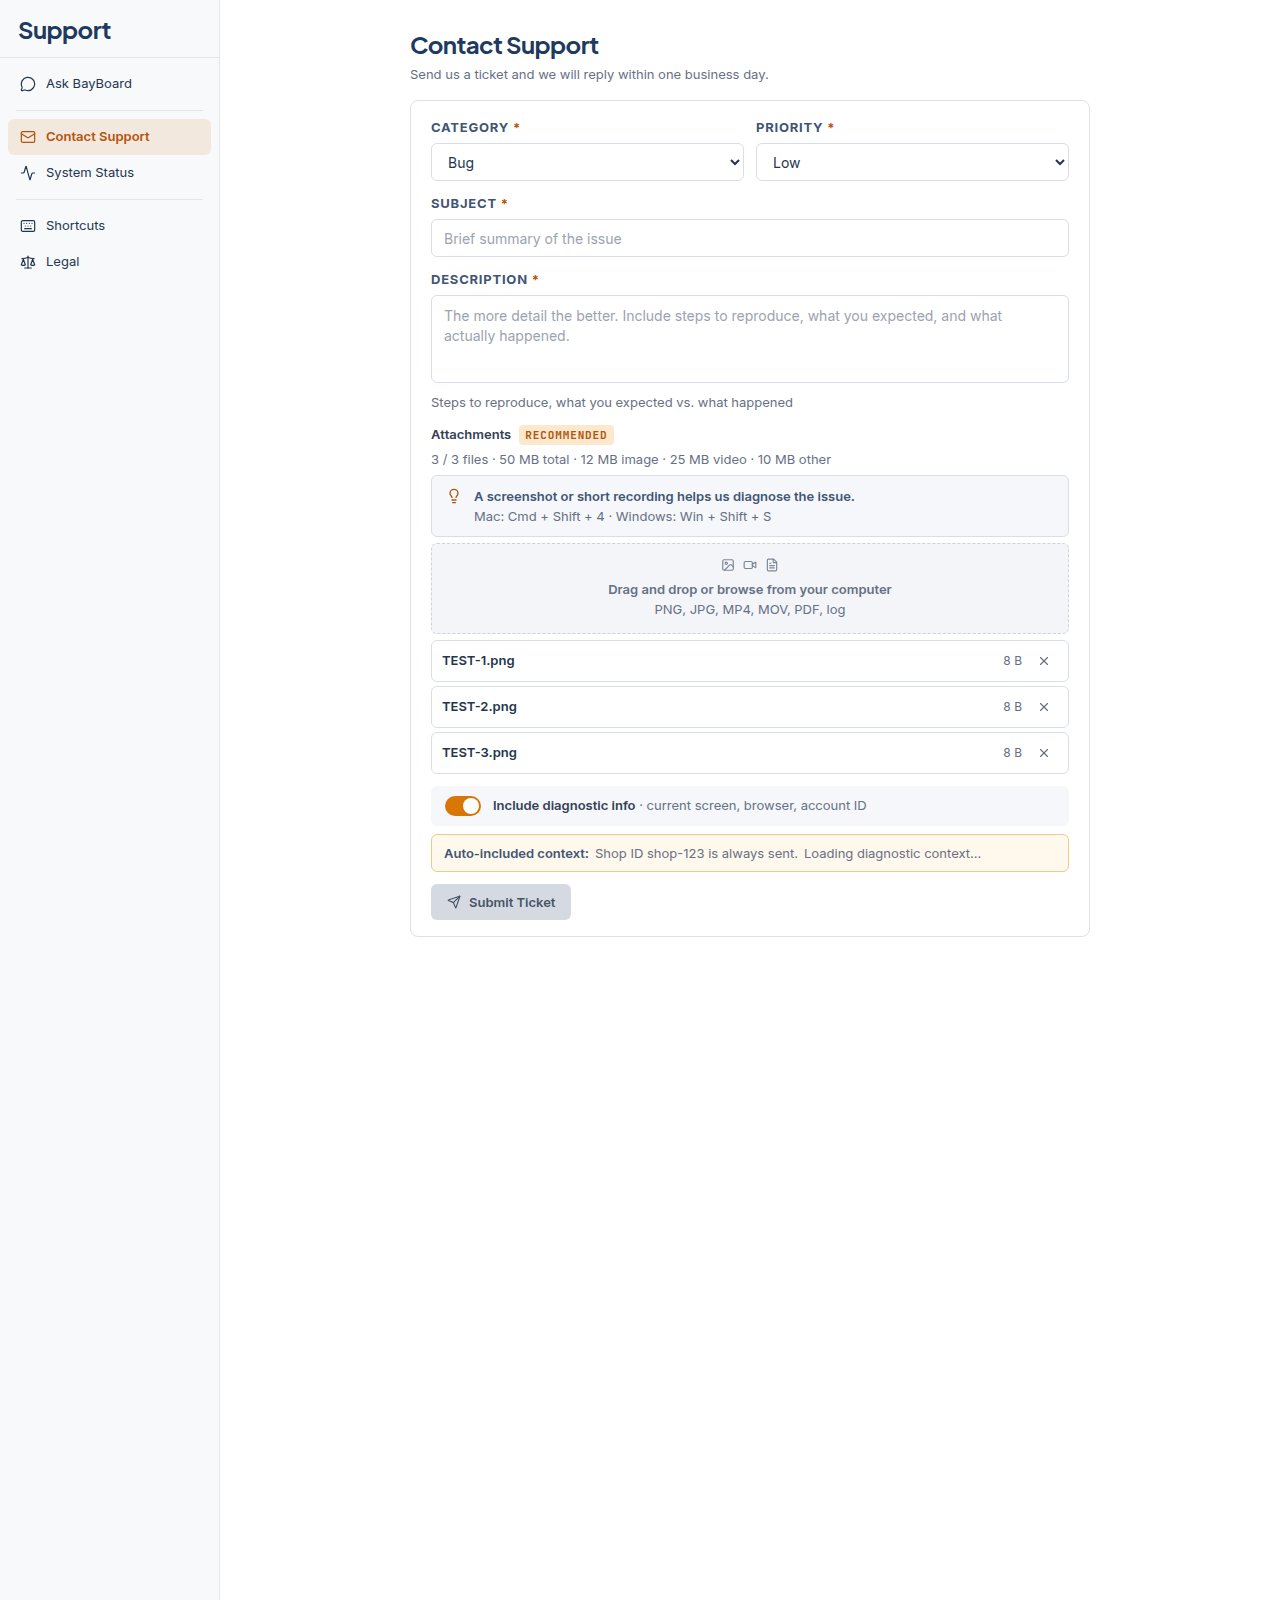
Send a ticket
1
Pick a Category
Choose Bug, How-to question, Billing, Feature request, Account / login, or Other. The default is Bug.
2
Pick a Priority
Choose Low, Normal, High, or Urgent (board down). The default is Normal. Use Urgent (board down) only when your shop cannot use the schedule board.
3
Write a Subject
A brief summary of the issue, up to 120 characters.
4
Write a Description
Up to 4000 characters. Include the steps to reproduce, what you expected, and what actually happened on the screen.
5
Add attachments (recommended)
Drag screenshots, recordings, or files into the drop zone, or click to browse from your computer. Accepted types are PNG, JPG, MP4, MOV, PDF, and log files.Limits: up to 3 files per ticket. Combined attachment size can be up to 50 MB. PNG and JPG can be up to 12 MB each. Video can be up to 25 MB each. PDF and log files can be up to 10 MB each.Your shop can have at most 3 unfinished uploads at once across open tickets.Each file shows its name and size with a Remove button. Video files show an upload progress bar with a cancel option while the ticket sends.
6
Decide on diagnostic info
The Include diagnostic info toggle is on by default. It sends your current screen, browser, and account ID with the ticket. Your Shop ID is always sent. Turn the toggle off if you do not want the optional context included.
7
Click Submit Ticket
Submit Ticket turns on once Subject and Description are filled in on the form. The button reads Sending Ticket… while the ticket sends to support.
If a file was not added
The form skips files that exceed the limits above, use an unsupported type, or have special characters in the file name. Remove a file from the drop zone, save it as PNG, JPG, MP4, MOV, PDF, or a log file, trim oversized recordings, or rename the file using letters, numbers, hyphens, or underscores only.If the ticket was not sent
An error line appears under the form.- “The ticket was not sent. Email support@bayboard.io for help.” The ticket did not reach the support team. Use that email link for help from the team instead.
- “Too many requests. Try again later.” Wait a few minutes, then click Submit Ticket one more time on this form.
- “Check every required field and try again.” Fill in Category, Priority, Subject, and the Description field on the form.